-
분산 쿼리 엔진 prestoSQL의 바뀐 이름 TrinoReview 2022. 1. 4. 00:31

귀엽다... Trino? 처음듣는데?
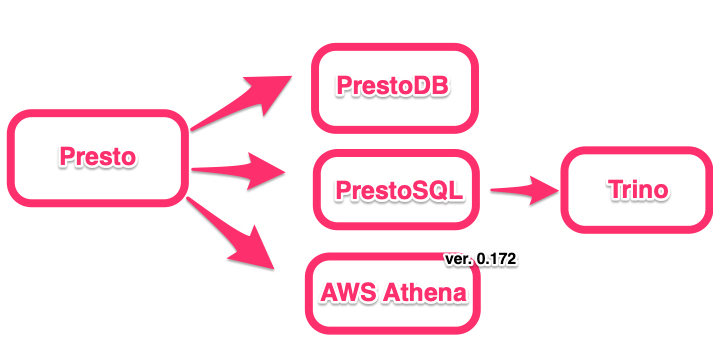
- 페이스북 내부 직원 약 1,000명은 Presto를 매일 페타바이트가 넘는 데이터를 스캔하는 30,000건이 넘는 쿼리를 페이스북 데이터를 조회하는데 사용하고 있다.
- presto는 페이스북이 최초 개발하여 오픈 소스로 공개한 대화식 데이터 쿼리 서비스. 이를 이용해 다양한 데이터베이스에 대한 일관된 ANSI SQL 질의가 가능하다.
- 빠른 속도를 보장하기 위해 엔진 레벨에서 분산 컴퓨팅 기법이 사용된다.
- 2020년 12월 27일 Presto 초기 멤버들이 페이스북을 나와 만든 PrestoSQL 프로젝트가 Trino로 리브랜딩 됨
- 350버전 이후로 prestoSQL에서 Trino로 완전히 이름이 바뀜
- Amazon은 presto 0.172 기반으로 시작해 자체 개발한 Amazon Athena 서버리스 상품을 제공하고 있다. 기능적인 건 presto나 trino에 비해 부족하지만 인프라 구성에 신경쓰지 않고 매니지드하게 다룰 수 있는 장점이 있음
Trino v.s. PrestoDB
What's the Difference Between Trino and PrestoDB?
What’s the Difference Between Trino and PrestoDB?
Read on to find out more about Trino and PrestoDB, what makes them unique, their differences, and discover which solution is better.
pandio.com
- 위 글은 제목은 비교하는 글이지만 막상 내용은 Trino를 추천하는 단락이 더 많다.
- prestoDB 용량 1.1G v.s. Trino 용량 607MB
- Trino는 제한적이지만 Oracle Connector를 사용할 수 있음(2020년 말부터는 PrestoDB도 Oracle Connector 지원)
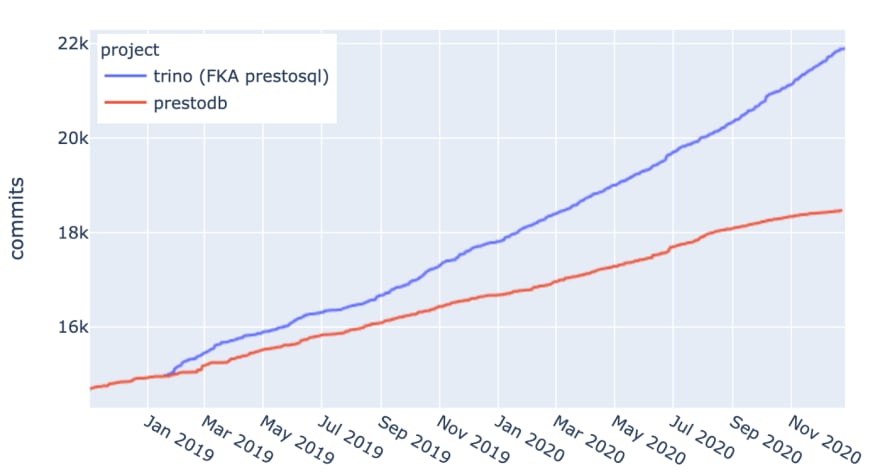
- 정리하자면 presto의 핵심 개발자들이 참여하는 Trino의 오픈소스 활동이 더 활발하고 다양한 DB에 대한 지원과 편의성이 빠르게 늘어나며 최적화 되어있어서 Trino를 더 권장
Config
https://trino.io/docs/current/installation/deployment.html
Deploying Trino — Trino 367 Documentation
Deploying Trino Requirements Linux operating system 64-bit required newer release preferred, especially when running on containers adequate ulimits for the user that runs the Trino process. These limits may depend on the specific Linux distribution you are
trino.io
coordinator와 worker
- 트리노는 2가지 타입의 서버가 있다 코디네이터와 워커
- 코디네이터는 쿼리를 플래닝하고 워커 노드들을 매니징한다.
- 테스트 목적으로는 싱글 인스턴스에서 코디네이터와 워커 두가지 역할을 동시해 하도록 할 수 있지만 그렇지 않은 경우에는 코디네이터 하나에 워커 하나 또는 그 이상을 함께 설치해야한다.
- 코디네이터는 워커와 클라이언트들과 REST API를 사용해서 통신한다.
- 워커들은 task들을 수행하고 데이타들을 프로세싱한다.
- 코디네이터들은 워커들로부터 받은 결과들을 최종적으로 클라이언트에 리턴해주는 것을 담당한다.
config.properties
기본적으로는 단일 노드로 돌아가지만 프로덕션 레벨에서는 코디네이터와 워커로 따로 분리해서 trino를 실행한다.
코디네이터 역할을 하는 노드는 아래 configure를 적용해서 실행하고 워커 역할을 하는 노드에서는 두번째 configure를 적용해서 실행하면 된다.- coordinator minimal configuration
coordinator=true node-scheduler.include-coordinator=false http-server.http.port=8080 query.max-memory=50GB query.max-memory-per-node=1GB query.max-total-memory-per-node=2GB discovery.uri=http://example.net:8080- worker minimal configuration
coordinator=false
http-server.http.port=8080
query.max-memory=50GB
query.max-memory-per-node=1GB
query.max-total-memory-per-node=2GB
discovery.uri=http://example.net:8080
node.properties
- 각 노드들의 설정, 노드 아이피 명시, 환경명 명시(클러스터들끼리 동일한 환경의 이름을 가져야함)
- production일 경우 환경명을 production으로 수정해서 사용
node.environment=development
node.data-dir=/data/trino
jvm.config
- jvm 메모리 설정
-server
-Xmx16G
-XX:-UseBiasedLocking
-XX:+UseG1GC
-XX:G1HeapRegionSize=32M
-XX:+ExplicitGCInvokesConcurrent
-XX:+ExitOnOutOfMemoryError
-XX:+HeapDumpOnOutOfMemoryError
-XX:-OmitStackTraceInFastThrow
-XX:ReservedCodeCacheSize=512M
-XX:PerMethodRecompilationCutoff=10000
-XX:PerBytecodeRecompilationCutoff=10000
-Djdk.attach.allowAttachSelf=true
-Djdk.nio.maxCachedBufferSize=2000000
log.properties
- log level 설정
io.trino=INFOhive.properties
- AWS glue 메타스토어 연결
connector.name=hive-hadoop2
hive.metastore=glue
hive.metastore.glue.aws-access-key=
hive.metastore.glue.aws-secret-key=
hive.s3.aws-access-key=
hive.s3.aws-secret-key=
hive.allow-drop-table=true
Dashboard
- docker로 간단하게 단일 노드의 trino를 시작할 수 있다.
- 위 config를 적용하기 위해서는 로컬의 디렉토리에 config들을 작성 후에 마운트해서 -v 옵션으로 docker를 실행해주면 된다.
- 코디네이터와 워커를 분리해서 실행하고 싶다면 docker-compose를 이용해서 이어주도록 하자.
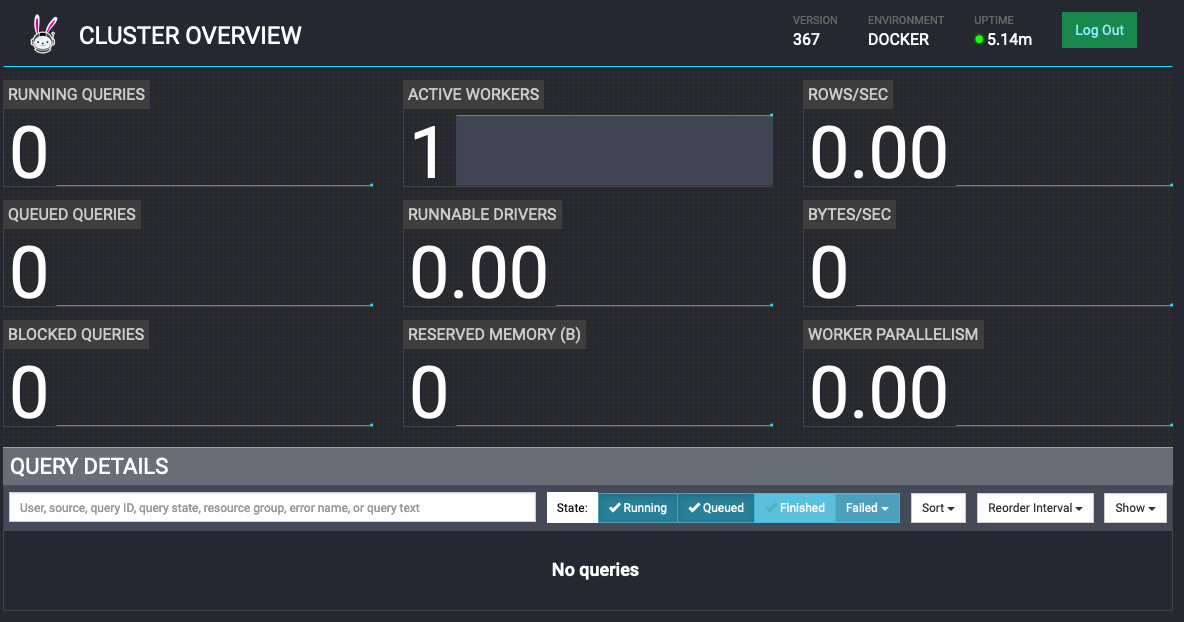
docker run -p 8080:8080 trinodb/trinolocalhost:8080로 접속하면 대쉬보드를 확인할 수 있다.
Client
- JDBC를 통해 클라이언트에서 원격 연결이 가능하다. 아래 사진은 DBeaver에서 trino를 연결하는 방법
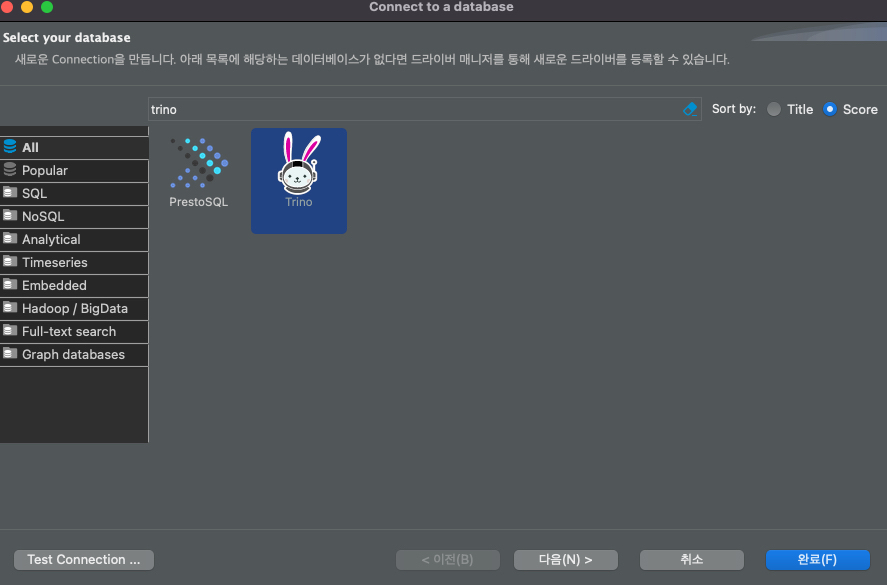
새로운 커넥션을 추가할 때 trino로 검색하고 다음을 누른다.
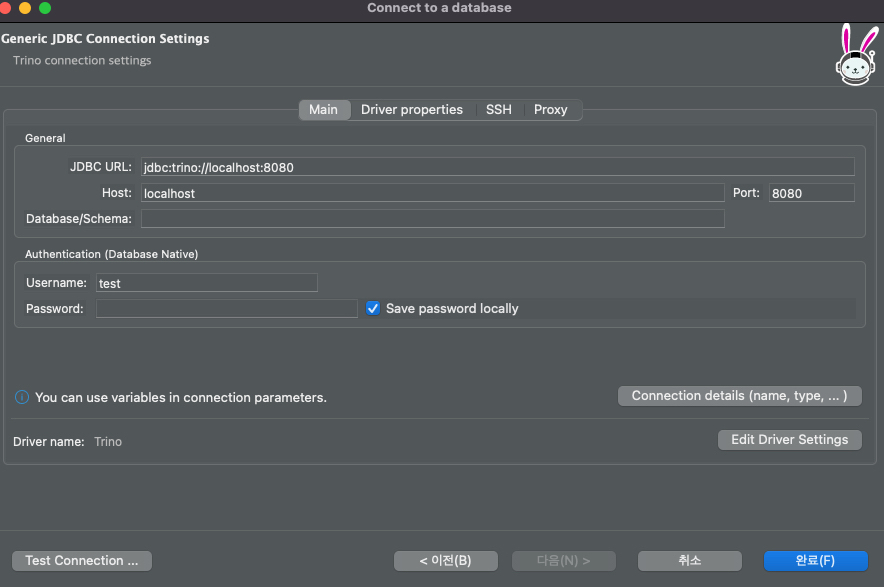
docker를 통해 포트포워딩으로 로컬의 8080과 JDBC로 연결하고 완료를 누른다.
연결을 위한 드라이버 라이브러리를 설치한 후에 접속할 수 있다.
'Review' 카테고리의 다른 글
네이버 DAN24 플링크와 아이스버그를 활용한 데이터 웨어하우스 세션 정리 (1) 2025.01.19 데이터 오케스트레이션 dagster와 dbt에 대해서 알아보기 (3) 2024.07.09 재택근무를 희망하는 히치하이커를 위한 안내서 (0) 2021.10.17 제닉스 XPAM 키보드 팜레스트 리뷰 (0) 2021.03.01 맥북, 노트북 거치대 추천 (0) 2020.09.27